Showing posts with label decorating. Show all posts

2.06.2013

Washi Tape Decorated Valentine Mini Mailboxes ♥ Mini Busones Para el Dia de San Valentin decorados con Cinta Washi

( ♥ Para español ver abajo♥)

Yes.  The washi tape addiction continues...

I was at Target the other day going through the dollar section, when I came across some mini tin mailboxes.  When I saw them my first thought was- I CAN TOTALLY DECORATE THESE WITH WASHI TAPE!  

So I did.


All I used was washi tape, letter stickers, and the tin mailboxes.  Yup super simple, yet super cute.  Just like I like it.  To make the heart for the flags I folded a small piece of washi tape with the sticky part facing out, then I cut half of a heart, opened it and listo- a heart. 

I took some candle holders I had, turned them over and placed each mail box on top (not my idea.  I have seen this floating around Pinterest.)  I, however, did not glue them on to the candle sticks that way the kids can take the mailbox down (without the candles stick) making it easier for them to handle and place little goodie inside (or peek into their own.) 

And look...


As soon as they were up, a little someone placed a love note for her papi.  Sigh.  


Happy Crafting!


♥♥♥

Si.  Mi adicción a la cinta washi continua ...

El otro día mientras andaba viendo la sección del dolar en Target vi unos mini buzones de metal.  Y lo primero que me paso por la mente fue- LOS PUEDO DECORAR CON CINTA WASHI!  

Y precisamente eso hice.


Solamente use cinta washi, calcamonias de letras, y los buzones de metal.  Super sencillo y super curioso. Tal y como me gusta.  Para hacer los corazonsitos en las banderas, necesitas un pedazo de washi, doblarlo por la mitad ( parte pegajosa por fuera) y corta la mitad de un corazón, ábrelo y listo, tienes un corazón.

Tome unos candelabros que tenia y los voltee al revés y les puse el buzón encima (esta no es mi idea, la vi por ahi en Pinterest.)  Pero, yo no los pegue al candelabro para que asi fuese mas facil para los pequeños poder bajar el buzon y meter las notitas de amor que gusten (o ver lo que han recibido.)   

Y miren...


En cuanto los acomode en su lugar, una pequeñita ya había puesto una notita para su papi.  

¡Buen dia!


10.19.2012

Decorate Plain Craft Pumpkins Using Washi Tape ♥ Decora Calabazas Sencillas Con Cinta Washi


Last year I bought on clearance these plain little pumkins.  They were rather sad lookingI wanted to make them smile.

El año pasado compre en oferta estas sencillas calabazitas.  Se veían muy triste y quería hacerlas sonreír. 


I love how they turned out.  And if you look really close, I swear you can see them smile. 

Me encanta como me quedaron.  Y le juro que cuando las veo de cerca hasta las puedo ver sonreír.  


To make all you need is a craft pumpkin, washi tape, and some creativity.

Para hacerlas lo único que necesitas unas calabazitas sencillas, cinta tipo washi, y tu creatividad. 

Happy Spooky Crafting!

10.03.2012

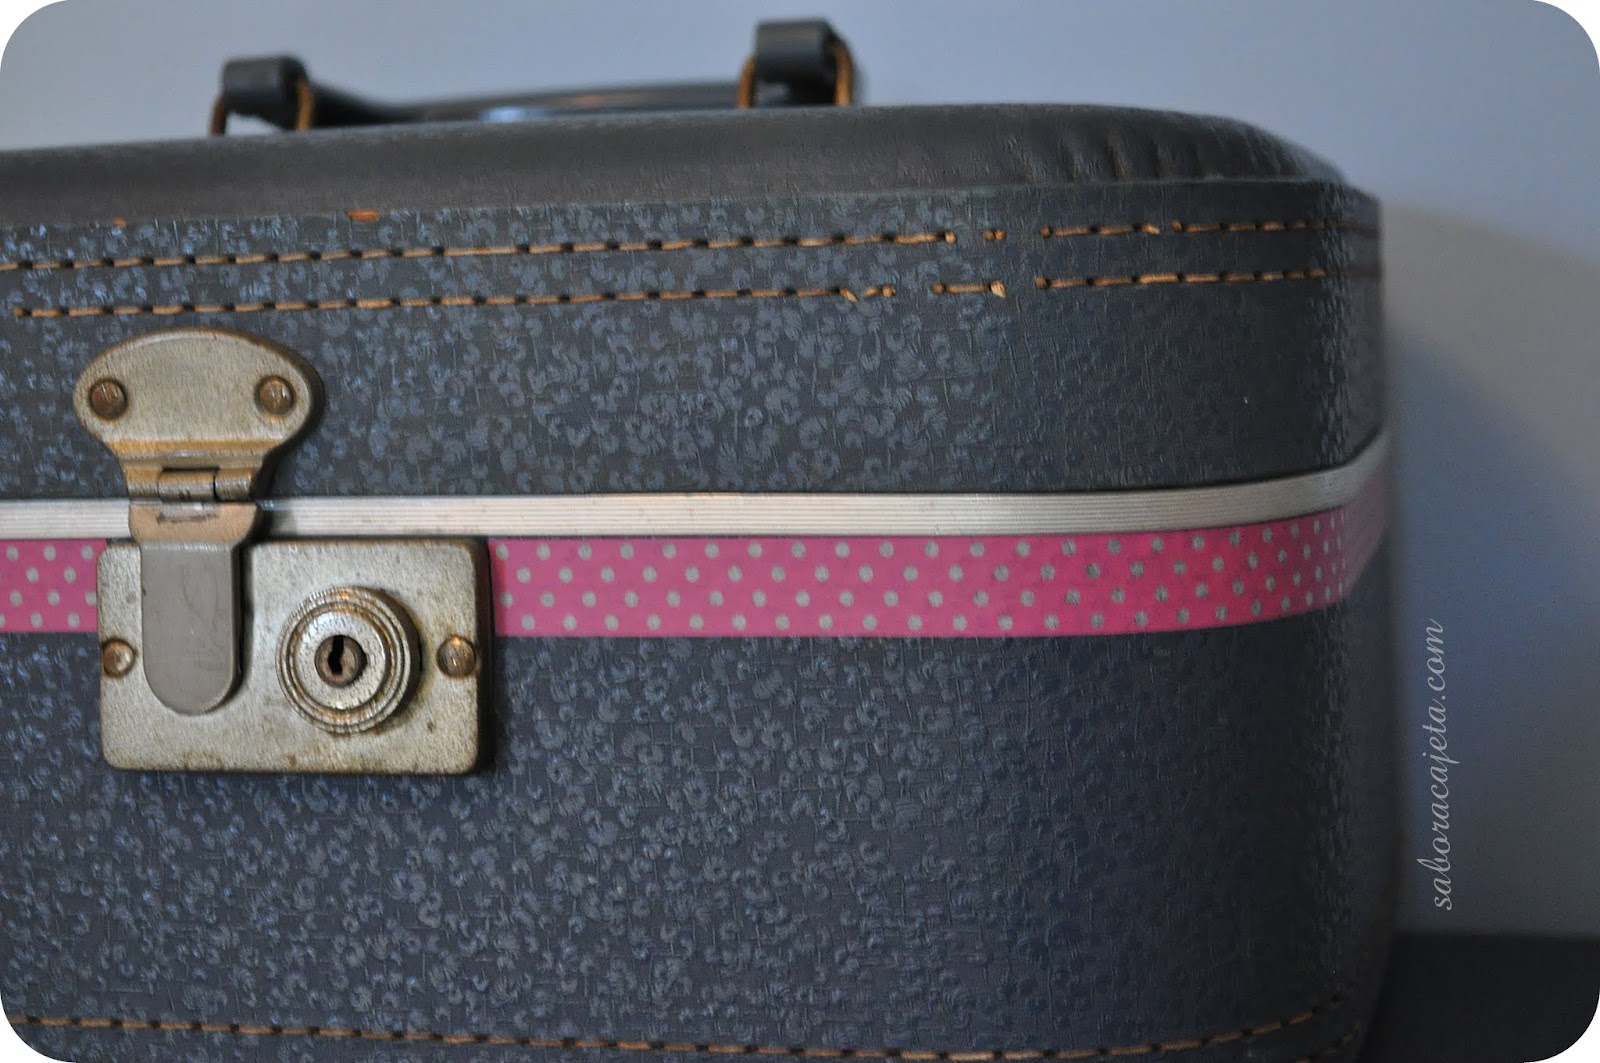
Decorate Vintage Suitcases with Washi Tape


I love vintage suitcases.  Some may even say I have an obsession.  (Maybe my love grew from that memory of my Abuela.)  I also love, love, love,  washi tape.  

And what better way to decorate a loved vintage suitcase (without the fear of ruining it) then by using washi tape? Oh yes.  


So the other day my chiquita picked out the colors of washi tape she liked and we decorated the suitcases that store all her dress up goodies.  


 Like it?

Of course most of the time they look like this:


What can I say, they are loved and so are all her costumes.  How fun is it to be a child!


To decorate all you need are vintage suitcases (I get most of mine from yard sales and thrift stores.  I'm always in a hunt for them.  I keep them in the craft room to store handmade goodies and supplies, I also love using them to displayed said goodies at my craft shows, and of course we use them through out the house to store other things...like my chiquitas dress up clothe.) You also need washi tape.  That's it.  Make sure to use a sharp blade when you get near the hardware.  Other than that it is supper simple.


Have fun decorating!


2.24.2012

organizing with jars


I love jars!  It is always hard for me to toss them because I know there's always some way I can use them.  Realistically I can't keep them all, so many do end up in the recycling bin, but then there are those lucky ones that get tucked into a closet waiting to be used.

My friend Noelle just gave me the lovely blue ones you see on the photo above.  I love them! And they look perfect on my kitchen windowsill. I can totally picture them full of wild flower clippings come Spring.

The other day I opened mentioned closet, that holds my stash of jars and well, I was overwhelmed by what I found.  At the same time, my mind got into creative mode and started to think of different ways I could make use of them.  Most of the jars once use to hold candles.  Those are the ones I'm the laziest to use because it requires a bit more work to clean them out.  This time though, in the organization/decluttering mode I am in, I challenged myself and got working. 


I began by placing the jars in warm water to allow for all the left over wax to melt.  I then tossed the wax and peeled the labels off.  Before the remaining film of wax  cooled off, I washed each jar with warm water.   


Once cleaned and dry  they were ready to be used.  Hum.  Where to use this lovely jars? One of the shelves in the toiletries/linen closet needed some reorganizing, the perfect place to make use of my newly clean jars!


Can you guess what kind of candle the large jar below held?


Yankee!  Yup, I need to start collecting more of these.  I love the size and the nice tight lid.  It would also be perfect for organizing bits in the craft room or spices in the kitchen. 

Other inspiration around the web to get me going:

In the craft room:  These are all great ways to use jars around the craft room. I especially like the small mason jars and sugar dispenser holding yarn and twine.  Perfect to keep the kid's yarn in place, instead of seeing the ball of yarn rolling all around the craft room, and getting tangled, and knotted, and...well, you get the picture. 

Clockwise from top: Yarn in mason jars homemade simple; jars on shelf inspire co; sugar dispenser real simple; under a shelf country living; sewing kit in a jar martha stewart; attached to the wall homemade simple;  on the table inspire co.

In the office/kids work area: How cute are those farm animal lids!!! 

 Clockwise from top left: animal lids apartment therapy; stack then sideways homemade simple; collection of  collections collection a day 2010; pencil organizer kootut murut.

In the kitchen or in the bathroom:  I'm in love with those shelves made out of old drawers.  I know not exactly jars, but you can display your lovely jars on them. 

Clockwise from left: Displayed in old drawers nest full of eggs; tooth brush/ flower holder etsy; on three tier stand zsa zsa bellagio.

In the garage or tool shed:

baby jar tool organizer homemade simple

Why stop there!  You can spruce up those jars by painting them with bold colors or use some chalk board paint to label them. 

Clockwise from top: blue jars a pumpkin & a princess; white jars and rope too much time on my hands (I WISH!) ; chalk lids wit & whistle; chalk labels apartment therapy .

The possibilities are endless.

Now let's get organized!


11.22.2011

thanksgiving roundup

Now please don't tell me Thanksgiving is, um, this Thursday!...It is?!!!  Well, good thing I've been collecting some photo inspiration around Pinterest, to help me decorate our table this year. 

Want to see?

I would like to...


And...


  Fall leaf garland I made using the same concept as my Halloween garland (here).


It is all in the colors.

Have a wonderful Thanksgiving!


10.17.2011

halloween garland


Truth be told, I don't have many Halloween decorations.  You see, I've never really been into the whole gory, spooky part of Halloween, though I do love to dress up.  But now that the kids are getting older, they are noticing the plainness of, well, our decorations.  So this year in the spirit of childhood, I decided to spruce things up a bit.  I started by picking up some new black candles to replace the every day red ones around the living area.  Added some bats on the walls (will show later), painted some frames black (also later) and brought out some past Halloween photos of the family to display in mentioned frames.  Yup, that, and I made this lovely little garland.  


What da ya think?


It is really easy to make.  I hand cut each circle (that is whey they aren't perfect.  But believe me, just today I ordered myself this to ease my life a bit.) and then hand sewed it together with stitching floss.   I got the idea (and combined) from both Dana of Made and Elsie from A Beutiful Mess.  I figured why make a tutorial when they have some great ones.  Check them out they are both very simple to follow. 

What about you?  Do you prefer the cute and simple Halloween decorations? Or the scary and  gory ones?